How to Grow Mung Bean Microgreens
When people think of healthy food, mung beans probably don’t jump to mind. That’s unfortunate, because mung beans are absolutely amazing for a number of things. If you’re looking for some amazing Asian cuisine or just want to add a little bit of color and zest to your cooking, mung beans are the perfect ingredient. You can get mung beans at almost any health food store or even online. Here’s how to plant mung beans:
Microgreens are tiny, live plants. They’re about 1-2 inches tall. Typically, you can grow mung bean microgreens alone. That’s because they don’t need much care – just be sure to provide lots of sun and good water (some varieties require a lot more moisture).
The first thing you have to do to get started is to put the mung bean microgreens in a tray. Make sure they are completely covered with water. Fill the bottom of the tray with wood shavings, about one inch deep. In a separate bowl, mix together about two cups of lime juice and one tablespoon of salt. That’s enough wood shaving for each tray. You’ll want to do this several times – enough wood shaving will give your plants a little bit of color and start them growing.
The next step is to transfer the tray into a hole in the ground, or wherever you’re planting your mung bean microgreens seed. Add a little bit of soil and spread it over the top of the tray. Avoid laying it too deep, because the moisture from the seeds may cause it to stick to the soil. Once it’s in place, put the seeds in the hole and water the soil to help it hold the seeds.
Step number two is to water the growing tray once every day. Make sure you don’t skip any of the steps. The next step is to set the seed on a sticky surface – like a piece of wax paper. Water the seed and allow it to set up. Then, remove the seed from the tray and place it into the hole in the ground. Repeat this process until you have all the seeds in one hole.
The third and final step is to dig a hole for the plastic cotyledons and stick them into the hole. The last step is to stick a wooden bowl into the hole and put the plastic cotyledons in. Water the wood to help it dry and to keep it from sticking to the inside of the wooden bowl. The micro green plants will be ready to harvest once the weather turns warm. Harvest the plants about two weeks after they have sprouted.
You may find mung bean microgreens are too small for your garden. There are other varieties that grow much larger – like the tiny Papaver paeoniflorum and the dwarf Philodendron. Just be aware that the smaller plants may struggle with larger weeds. It’s a good idea to give the smaller plants an extra watering or consider repotting the larger ones in large pots once you have planted them.
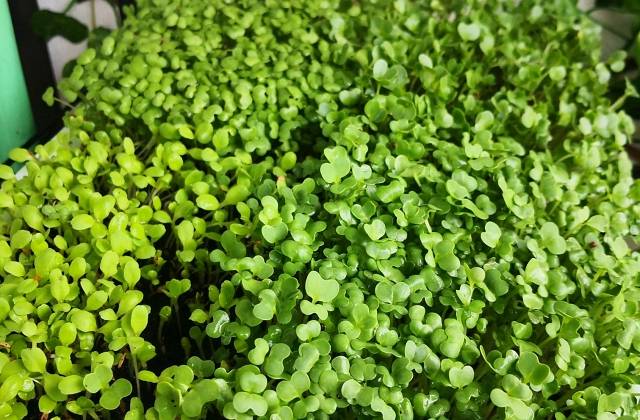
Here’s one way to see pic of growing mung bean microgreens in containers. This is a great way to get started. Don’t be afraid to experiment with different varieties until you find the variety that works best for you. Micro greens can be hard to harvest – you’ll want to do this soon if you want to enjoy the fresh sprouts. See pic below.
Now here is how you can harvest your mung bean microgreens. You’ll need a sharp knife, something to pick up the leaves from the stalk, your hand, and hot water. The tip of the knife should be slightly wider than your thumb. Pluck a leaf off the stalk as you gently scoop the entire plant out.
When choosing a pot for growing mung bean microgreens, choose one with drainage holes. Use your hand to guide the roots of the plants. The micro green plants have tiny little roots so be careful when pulling them out. The stems of these plants grow at the tops of the leaves. Pluck a leaf from either end to remove it easily from the stem.
After plucking a mung bean microgreen plant from the stalk, remove any excess leaves. If the plants are very large, you may need to use two knives to get them to fit in their small growing tray. Fill the growing tray about half-way full with your soil mix and your microgreen seeds or seedlings will be ready to begin growing. When the plants have produced new shoots, they will be ready to transplant into a separate container.